Pages

Saturday 17 May 2014

Summer Theme Party Round Up

I thought I would have a go at my first party round up today! I've been meaning to do one for ages but never quite gotten around to it!
With summer just around the corner I thought I would look at summer themed parties - so here are some of my favourite ideas I have found.

Ice Cream Party
Ice cream is the perfect summer treat and is perfect for indoor and outdoor parties (the weather in Scotland can be unpredictable so it's good to have plenty of indoor ideas!).
Provide your guests with plenty of toppings and sauces and don't forget you can include some yummy summer fruits for a healthier option!
I love the idea of an ice cream bar as you can use it on any scale and it can be set up quite quickly so if the kids have some friends round you could surprise them with a mini ice cream bar treat. You might find you have twice as many kids at your house the following week!

Watermelon Jellies
How about these cute little jellies for a watermelon themed party or just as a sweet way of serving up pudding?

Luau Party
An Hawaiian theme is great for summer. There are loads of UK based companies who stock Hawaiian themed party products too.
 

I'm sure we're all familiar with flies getting into our drinks at outdoor summer events so this simple idea is great.

I think the use of buckets and spades in your summer party decor is a must!! You could use plastic buckets for a fun party or those little tin ones in pretty colours for a more chic sophisticated feel.
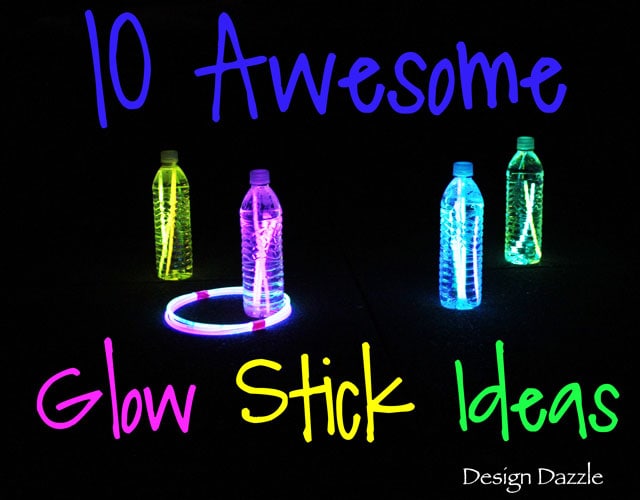
Who doesn't love glow sticks?! And you can get them at Pound shops too so they are a great cheap way to brighten up your party when the sun starts to set! 
There are lots of fun ways to use glow sticks at your party. Personally I wouldn't use any that suggest using the liquid from inside the sticks unless you can be sure it's sealed in a jar or bottle. 
You can make cheap lanterns by cutting the end off a couple of glow sticks and pouring the contents into jars or bottles of water. Make sure you secure the lids well (maybe some tape or glue).
Use them to make a ring toss or bowling game or bury some in an ice bucket.

Well, that's it for today's round up. I hope it has helped to inspire you!
Check back soon for more party fun!
Suz x

Sunday 23 March 2014

Pizza Boats!


We had a very busy day yesterday at LHPC HQ!!
After the lovely banana dolphins at lunchtime we went to the school's Daffodil Tea and Theo had lots of fun operating a digger and getting his face painted!
I decided to make mini baguette pizzas for tea as it was just the two of us but had a brainwave as the rolls I got reminded me of little boats!! So, after I had quickly drawn a template and cut out these little sails, we spent an hour decorating them.

Theo wanted to make a classic skull and crossbones sail first, and then he wanted to do the British Flag. I went for flowers and butterflies for my first sail and then thought I'd honour my Viking heritage with a Viking long ship sail!! I used a sticker on this one too!
We then used kebab skewers as masts (I cut about 2 inches of the top so they wouldn't be too long). Theo got his Lego figures out to sail our ships for us!!
Below is a template you can use if you would like to have a go at making sails yourself. Try them on different food - hotdogs, sausages, cakes!


I hope you have lots of fun making food interesting and do please share any photos of your creations!
Take care
Suz (and Theo)

Saturday 22 March 2014

Banana Dolphins!!


Hello, I hope you're all well.
I spotted these adorable banana dolphins on Facebook yesterday and just had to try them out for myself!!
They are so easy to make - I made them while waiting for the bacon to grill - and they were a big hit with Theo!!
The original idea is from Luz's Unique Creations - check out their Facebook page here.
So, how to make them? This is what I did - cut a banana in half (the top half looks much better but I didn't want to waste the bottom bit so I used that too). Cut a slit in the end to create a mouth. Put a grape, raspberry or something into the mouth to keep it open slightly. Put the banana in a small bowl or tub and fill with small fruits - whatever you have or are your favourites! I used a felt pen to make the eyes but you could use edible markers or raisins. I was doing it very quickly and as you don't eat the skin from a banana felt it would be OK to use a normal felt tip.

In other news!! I am officially relaunching the website this weekend! To help celebrate, I have a great competition on my Facebook page - please pop over and check it out here for a chance to win a £5 voucher!

Well, that's it from me for today - I'm taking Theo to the Daffodil Tea at school this afternoon so better go and get ready.
Take care
Suz x

Wednesday 5 March 2014

New Website & Update on Life!!

I'm so sorry I haven't posted here very much lately! I always mean to but life just seems to get in the way! I have been suffering quite badly with a sore knee and go to see a surgeon next week to see what can be done about it. It has also been quite a difficult time with Theo - he went on his first ever trip away from home at the beginning of February with his class to go skiing. He really enjoyed himself but he was very anxious in the weeks leading up to it. I'm so proud of him for managing something so huge - although his teachers couldn't get him to have a shower once and I'm pretty sure he only changed his clothes 2 or 3 times!!

Due to some unforeseen issues I have had to set up a new website which I am currently uploading products to - I've been pretty busy over the last 3 years so it might take awhile! You can access the shop using the tab at the top of the page. The website now combines my Little Handmade Party Company Shop with my Arda Cards shop and I have also set up a separate section for special needs resources. All the Little Handmade Company products and special needs resources will be in PDF format to make it easier for most people to print them easily. Craft products will still be JPG's and designer resources are mostly PNG or PSD.

I will try my best to post more regularly about new products and keep you updated about the progress on the website. I think I might have a little relaunch party when most things are uploaded.
I'm going to head off to bed now though as I have been working all day and I'm seeing double now!!
Take care
Suz x

Sunday 13 October 2013

Hello!! I'm Back!

Hello - I can't believe how it's been since I last posted! And so much has happened since then! The kids went back to school, we had Nienna's postponed birthday party, my eldest daughter turned 18 and moved into her own flat, my mum went into hospital for an op and my sister and her son came up to help me out with her and my Grandma!!! Phew!!
OK, so tonight I'll just share some of the photos from Nienna's very girly pink Cotton Candy party. I must say that this party turned out exactly how I imagined it in my head and I was so pleased with everything. I really went to town on the small details and they paid off - although I discovered that the piping bags I had were of very little use what-so-ever! I'll be looking for some tips in that department if you have any to share.
First up - I decided to get really creative in the kitchen and make my own chocolate cupcake toppers in the shape of the cotton candy and lollipops I designed for the printables.
Piping with candy melts really isn't easy as they set so quickly and the oil from the chocolate was just being squeezed through the material of the piping bag!! I was a bit disappointed with these until I turned them over and this was the result I got!!
 Not bad for an amateur! I also attempted cookie pops and macarons for the first time too!! I like to live dangerously! My macarons were something of a disaster, albeit a rather yummy tasting disaster!

The photo below shows the table setting with a cake pop, cookie pop and name pop alongside a little vase with pink gerbera and a mini milk bottle with pink paper straw (and flag).
Each girl had a doily place mat and Nienna helped me to add half a small doily to each of the vases and the milk bottles too.
I think the different shades of pink flowers worked really well on the tables and instantly added a professional touch with the need for any fancy flower arranging skills which is something I don't have!
The mini Pick and Mix table was a huge success as usual. I honestly suggest having something like this at the next party you throw for your kids. It doesn't have to cost the earth as you can pick up good offers on sweets in the supermarkets and the discount stores are fantastic for sweets too. I used a couple of small fishbowl vases, one tall candle holder type glass, some plastic cocktails glasses from Poundland and little sandwich paste jars with party circle tags on. All the sweets were pink and the little pots in the middle are ice cream pots from Home Bargains.
As it was a very girly party, I provided some make up from my rather pathetic stash for them to play with!! They also had nail varnish which had a little pen applicator and a stash of gems built in to the bottle!! They each got to take one of these home along with a hairbrush and these fabulous handbag gift bags which had lots of goodies inside.
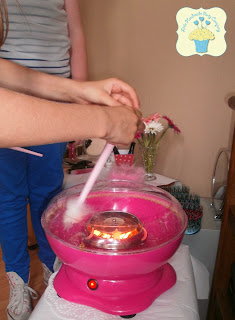
Now, no self respecting Cotton Candy party would be complete with some candy floss!! Thanks to my best friend who lent me her candy floss machine.
And here we have the birthday girl with her candy floss and her birthday cupcake as I didn't make a big cake - far too many sweet things to eat already!

Here's a lovely photo of the girls getting stuck into their cake pops after their lunch.
I'll leave you with other photos of the day and next time I'll share some photos from Lorien's 18th Birthday Horrible Histories party.


Night all, take care
Suz xx

Saturday 3 August 2013

A Night At The Movies

We had a lovely trip to the Living Room Cinema last night. The food was fantastic and included hot dogs, nachos and cheese, popcorn, pick and mix, cupcakes and sodas.
 I used a stash of old 3D glasses to decorate the table. Large tin buckets from Poundland were used for popcorn. I added depth using boxes wrapped with white wallpaper and a few paper doilies added a nice touch.


We watched Oz, The Great & Powerful and everyone had a great night.
If you want to download any of the printable products click here. And I'd love to see any photos of your movie nights.
Suz x

Wednesday 17 July 2013

Alice In Wonderland Tea Party

Hello! It's me! Did you wonder where I'd gone? I've been spending some time with the family as the kids have been off school for the summer holidays for just over a week now and my eldest daughter has come home to stay for awhile (or maybe longer!).
The Alice In Wonderland party was a great success and we had gorgeous weather! I think it was the hottest day of the year so far!
Above, you can see a small coffee table with an old tea set I found in a charity shop and my 3 tired fruit basket which had little favours of tea bags and candy pouches for guests to enjoy. 
The children at the party really enjoy the mini pick and mix bar. The sweets were mostly from a pound shop or on special offer from the supermarkets so weren't too expensive. At the back there are two fish bowl vases with lollipops and marshmallows and a old glass sweet stand from the charity shop. I also used popcorn treat boxes and food trays from my Wonderland range. Small candy bags and tongs were bought from Amazon.
Delicious red cake pops were also a huge hit with the little ones. You can also see two large tin buckets which we used for popcorn and crisps. 
I'm not much of a flower arranger but I'm really pleased with the arrangements I did using teapots and these tea cup garden decorations. Once again, I kept prices down by buying these from a pound shop and I simply repainted them to match the colour scheme. 
Some bunting from the Wonderland range.
This juice dispenser was a great find at John Lewis. The kids really liked the fact they could get their own drink without having to have an adult open up tight lids on bottles.
Cute mini tea set in a spotty suitcase! Perfect for decorating this party.
This is a selection canvases my daughter painted. They should have hanging around the marquee but it was quite windy and the sides were blowing in a lot so we decided it was safer if they went on the ground. 
My friend made these cool signs which we nailed to a tree! 
Theo as the Doormouse posing in my photobooth frame! Nienna and Lorien added some red hearts for the occasion.
And that's me!! But anyway.... quickly moving on something far prettier...
Here's Nienna as the White Queen!
And finally, napkins with the napkin rings from The Wonderland collection.

So there you have it... my Wonderland Tea Party. I hope it has helped to inspire you with some ideas which are pretty easy to pull off even on a budget.
Take care 
Suz x