
Here we are at part 3 of our bucket list. Have you tried any of the projects yet?
Lets get cracking with another projects for you to try out, shall we?
Lets get cracking with another projects for you to try out, shall we?
#21 Chalk Board Paint
This DIY chalk board paint looks so much fun and could be used for kinds of projects - my mind is brimming with ideas to try out if I get the time. Check out the easy tutorial here.
Need to find supplies for this project?


#22 Hand/Finger Knitting

This is a really good tutorial for finger knitting. It's also a really good one to get the kids involved in.
#23 Glitter Glasses

I absolutely love glitter! I have it in all different colours! Last year I helped the kids make glitter glasses for their teachers at the end of term so I can tell you that's it's great fun and not too difficult to get simple results. You basically just need some Mod Podge, glitter and a paint brush. We used the Mod Podge to seal our glasses but in this tutorial they use a sealant instead.


Need supplies?
#24 Royal Icing & Icing Biscuits

Have you seen those amazing iced biscuits that are all the rage at the moment? Here is a great beginners tutorial to show you how you can make your own.


#25 Photography Basics

I would to learn more about photography and this series looks pretty good.
#26 Zentangle

I love the idea of Zentangle art as you don't need to be good at drawing to do it. Stick on a relaxing CD, get doodling and explore your creativity. Here are some tips and inspiration to get you started.
#27 Mini Dresser From Match Boxes
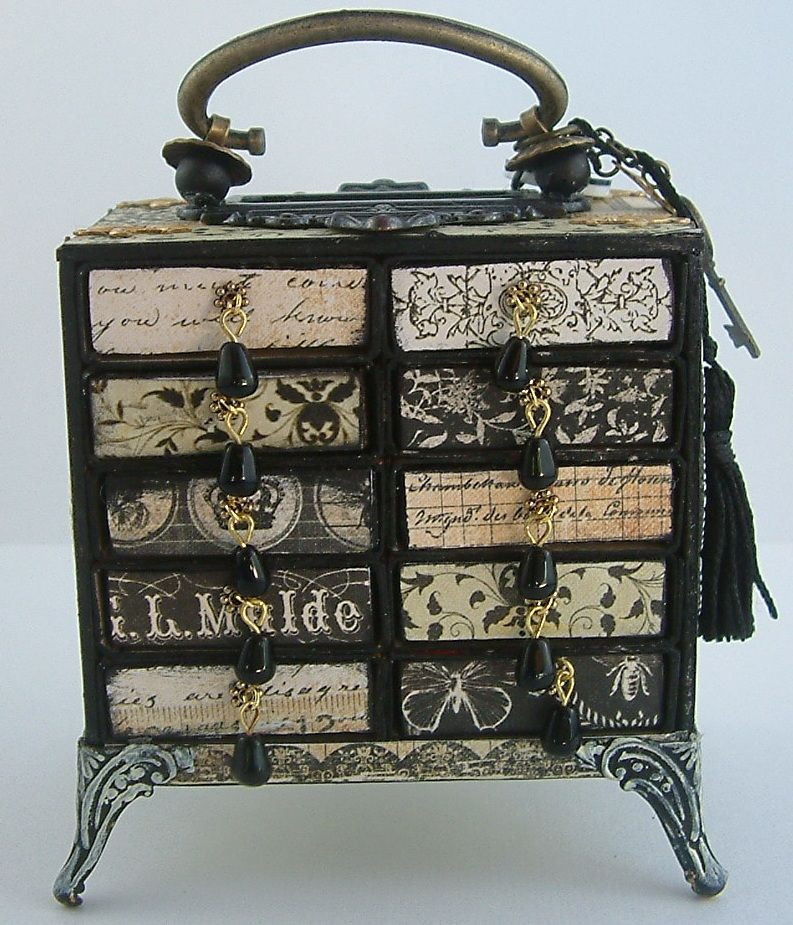
Making little chests of drawers from match boxes was probably something many of us did as kids but this takes it to a whole new level! Here you will find a two part video tutorial to make beautiful mini dressers.


#28 T-Shirt Scarf
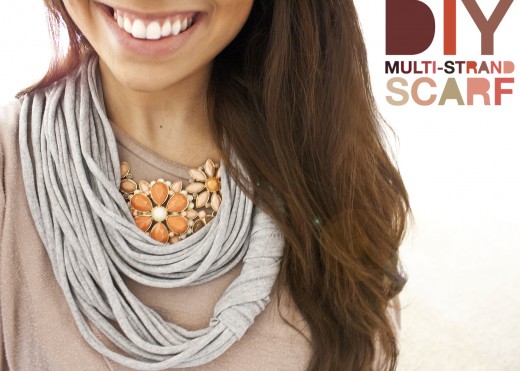
This scarf looks pretty awesome and there's absolutely no sewing involved! Looks like a great way to re-use an old T-shirt and liven up your wardrobe!
#29 Orange Candles
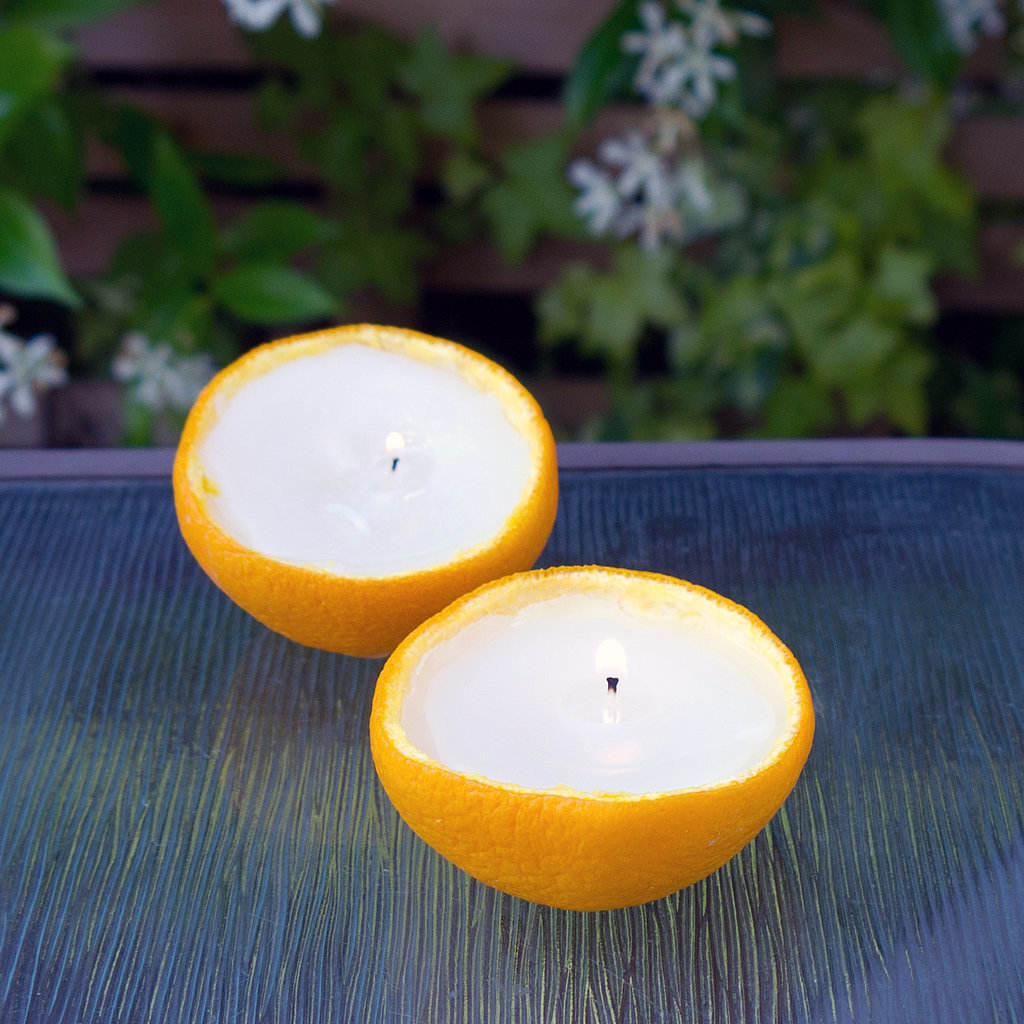
Keep the bugs away during the summer months with these cheap and easy to make citronella candles.
You could use other things as a container too but the orange rinds do look kinda cute don't they?


#30 Glitter Clothes Pin Magnets

These are really easy to make and will quickly spice up your memo boards or fridge door. Get the know how here.


So that's it for another installment! Check out previous installments with the links below and if you're sharing your photos on Facebook, Twitter or Instagram use the hashtag #craftersbucketlist.
Until next time, take care and happy crafting.
Suz xx


